Vylos on macOS
Manage WireGuard VPN tunnels on macOS with a native split-view interface, menu bar popover, keyboard shortcuts, and Start at Login support.
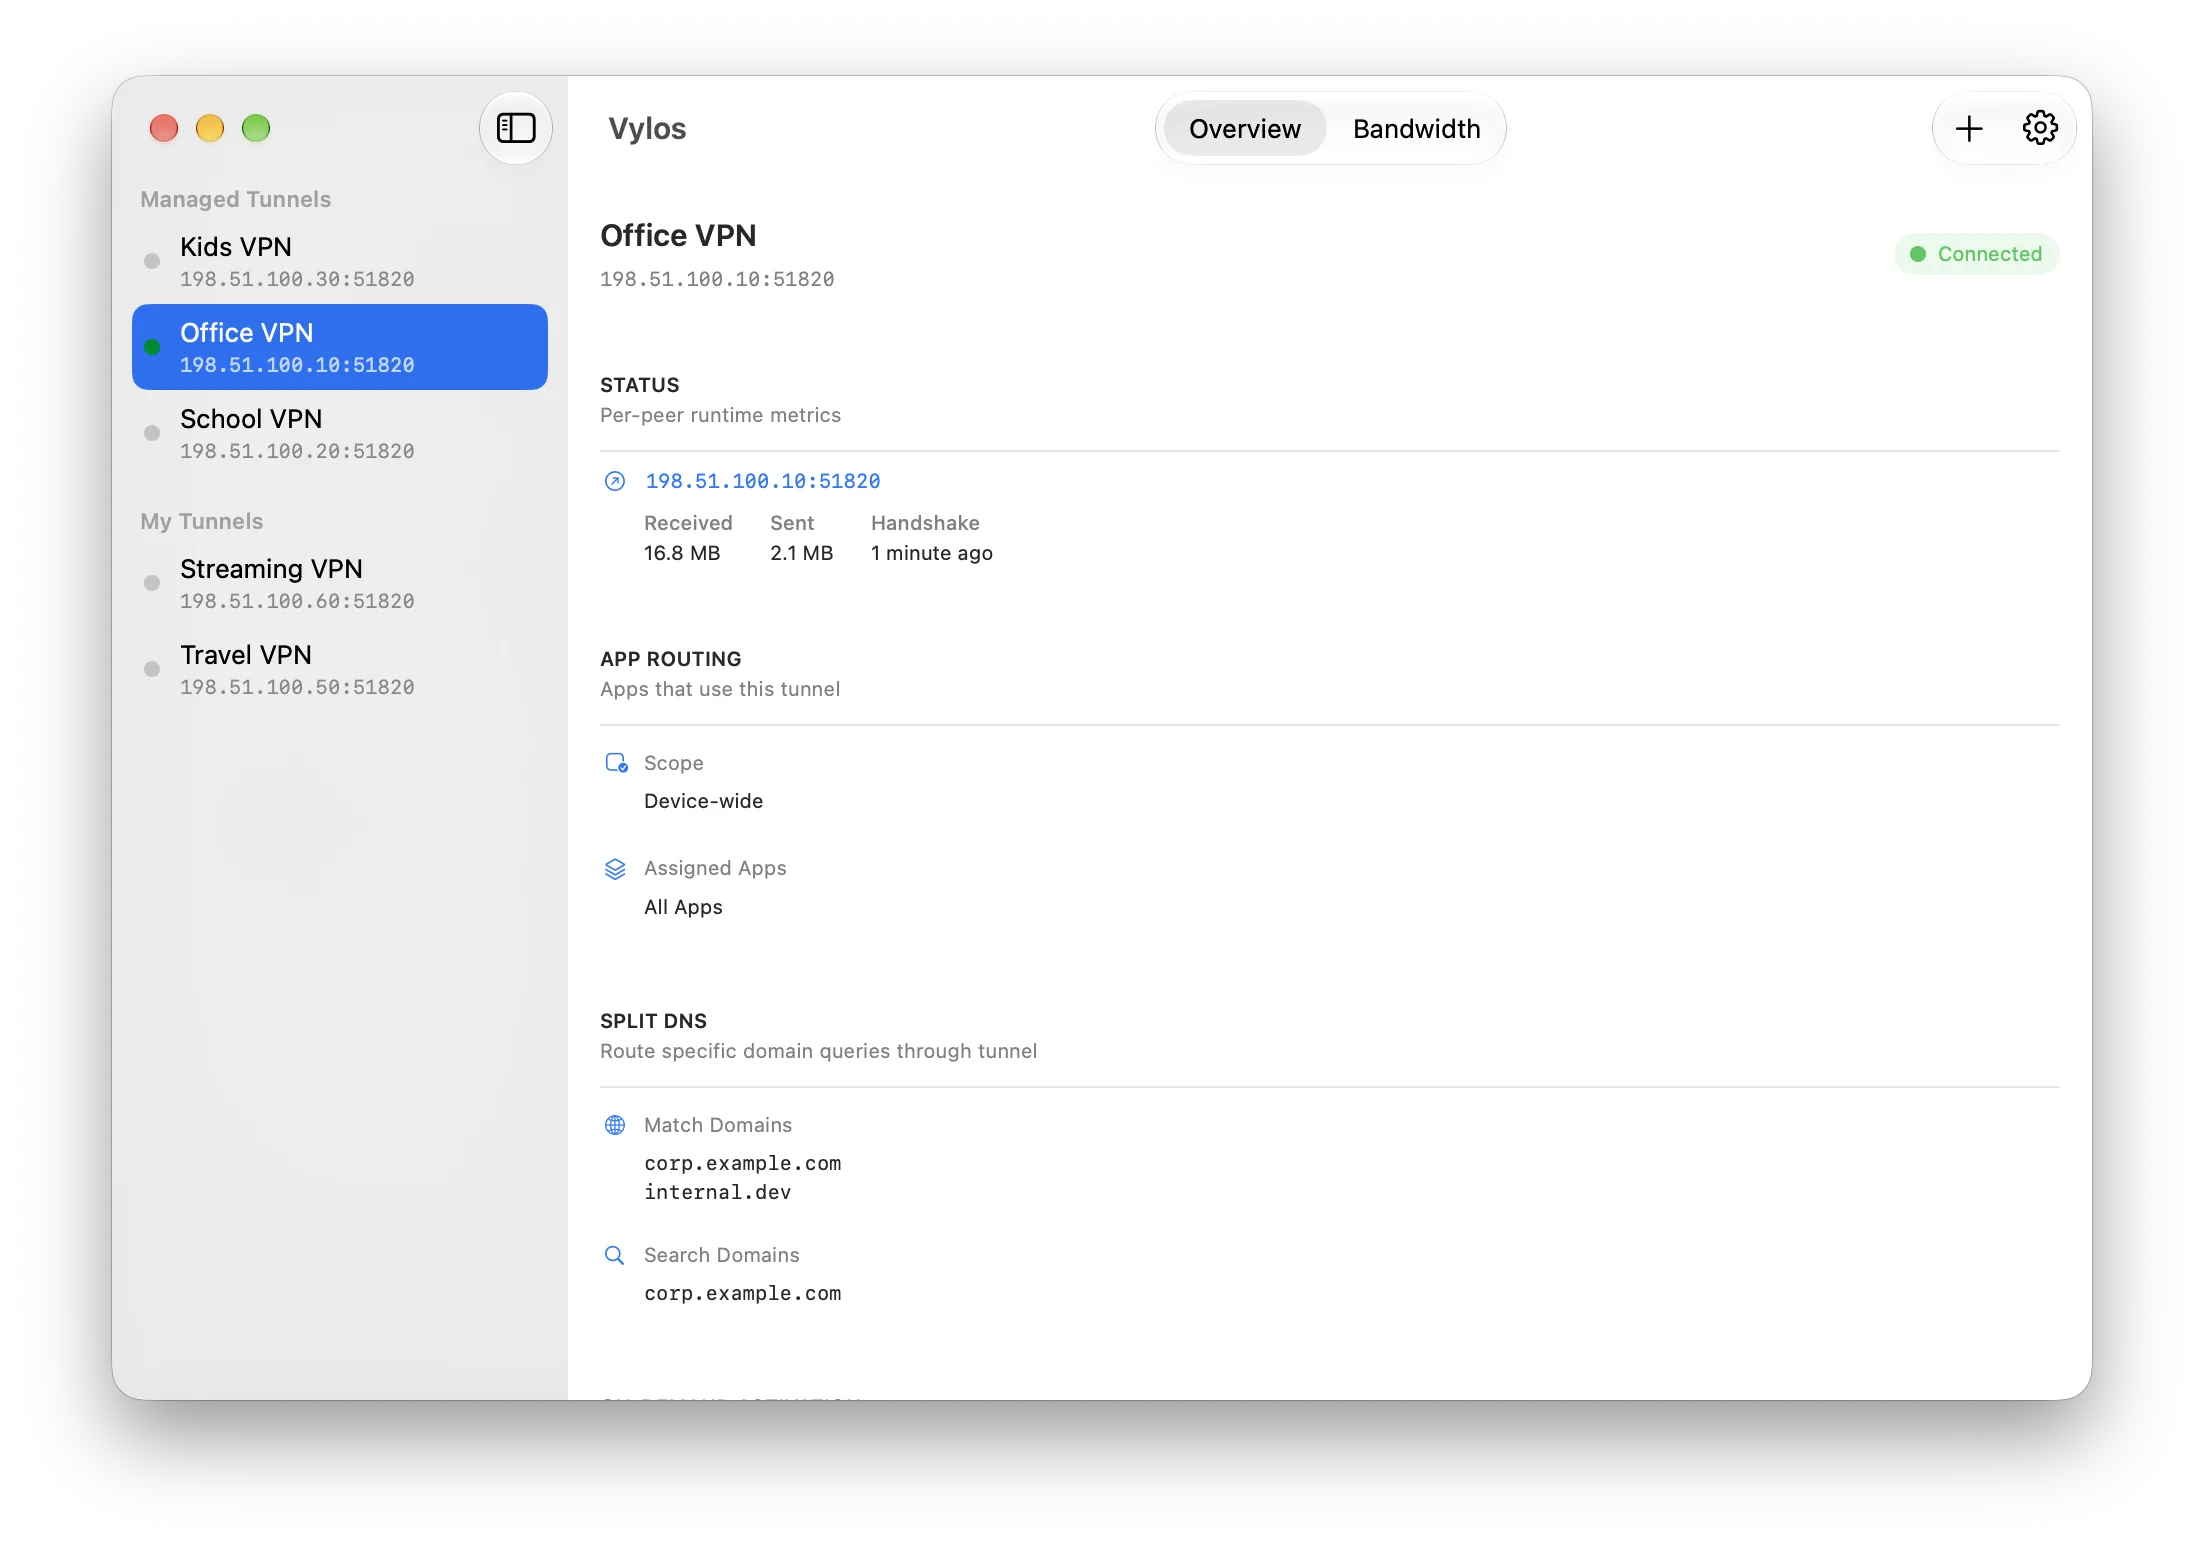
Lifecycle and Shortcuts
Vylos on macOS follows the standard Mac app lifecycle. Closing the main window with the red traffic-light button keeps Vylos running so the menu bar status item stays available.
Clicking the Vylos icon in the Dock brings the main window back.
Top Menu
The top-of-screen menu bar exposes the most common actions:
| Menu | Item | Shortcut |
|---|---|---|
| Vylos | Settings… | ⌘ , |
| File | New Tunnel… | ⌘ N |
| File | Import… | ⌘ O |
| File | Export Archive… | ⌘ ⇧ E |
| Tunnel | Connect | ⌘ K |
| Tunnel | Disconnect | ⌘ ⇧ K |
| Tunnel | Edit Tunnel… | ⌘ E |
| Tunnel | Delete Tunnel… | ⌘ ⌫ |
| View | Show Overview | ⌘ 1 |
| View | Show Bandwidth | ⌘ 2 |
Tunnel and View items remain visible but disabled until a tunnel is selected in the sidebar, then become enabled when the action applies to that tunnel.
Settings
Pressing ⌘ , (or choosing Vylos → Settings…) opens a dedicated Settings window with a sidebar that mirrors macOS System Settings. The window stays separate from the main tunnel list so you can adjust settings while a tunnel session keeps running.
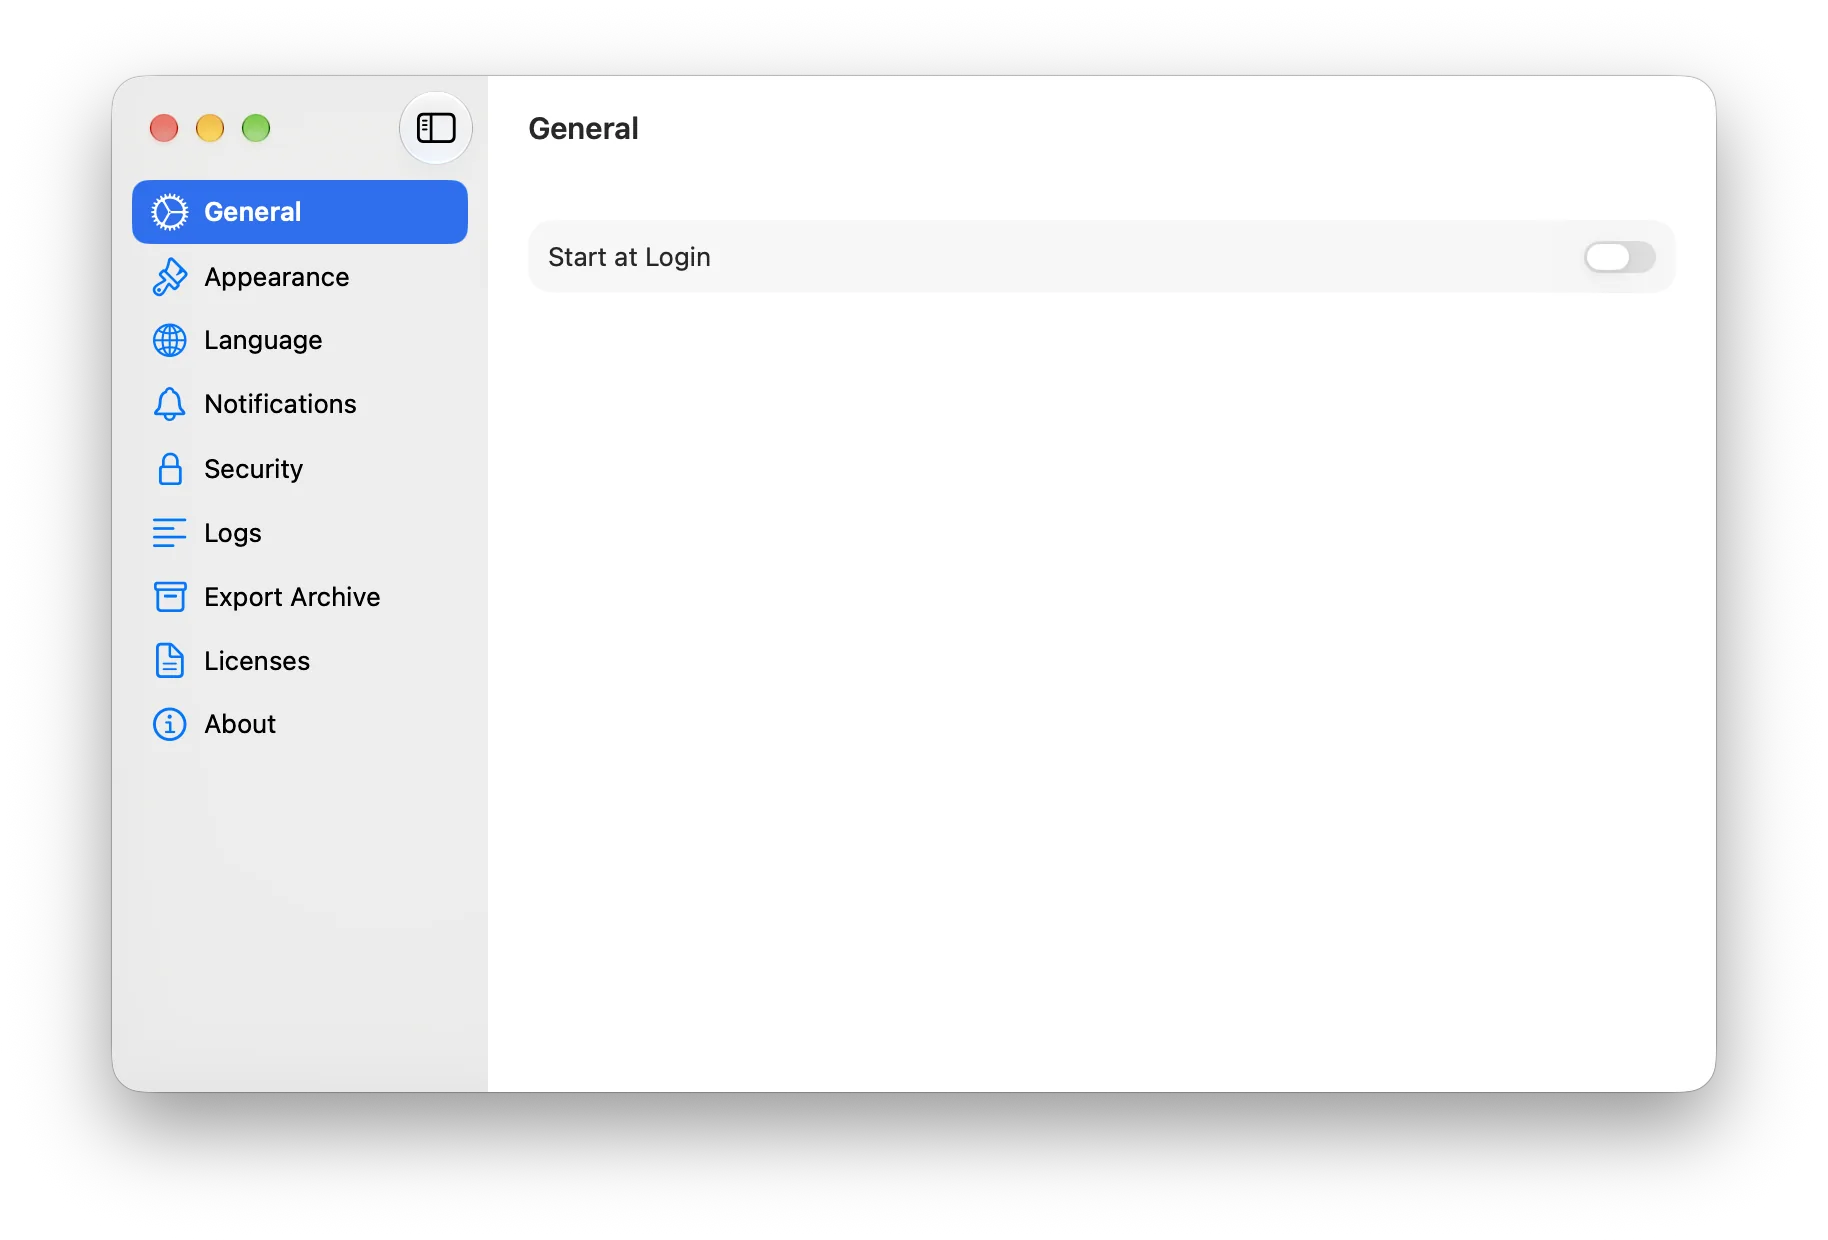
The sidebar lists nine panes:
| Pane | Contents |
|---|---|
| General | Start at Login toggle. |
| Appearance | System / Light / Dark mode picker. |
| Language | Instructions and a shortcut to the macOS app-language setting. |
| Notifications | Per-event notification toggles. |
| Security | App lock method (off, Touch ID / Passcode, authenticator app TOTP). |
| Logs | App and tunnel logs viewer with copy and clear actions. |
| Export Archive | ZIP archive export of user-created tunnels via the macOS Save panel. |
| Licenses | Open-source acknowledgements for bundled dependencies. |
| About | App version, WireGuard backend version, and links to legal documents. |
note
On macOS 12 the dedicated Settings window is unavailable, and ⌘ , falls back to the legacy modal sheet that ships the same content. macOS 13 and later get the sidebar layout described above.
Menu Bar
Vylos installs a status item in the menu bar so you can monitor and toggle tunnels without bringing the main window forward. Its Vylos glyph is dim while every tunnel is inactive and becomes fully visible while a tunnel is engaged.
Clicking the status item opens a dropdown that follows the WireGuard layout, with one Vylos-specific addition (Settings…). On macOS 13 and later, ⌘Q on the main window leaves the menu bar status item alive so you can come back without re-authenticating; choosing Quit Vylos from the menu bar still terminates the app.
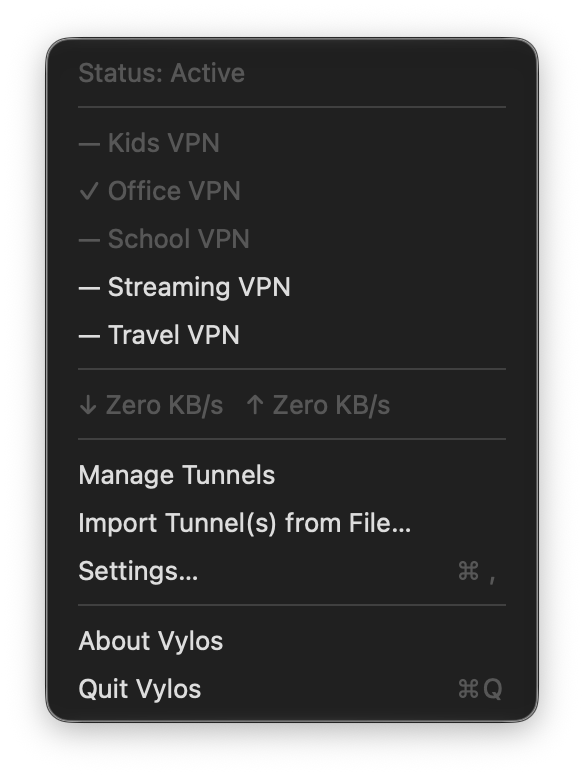
Active tunnels carry a check mark prefix; inactive tunnels carry an em-dash. App tunnels are clickable so you can flip them on or off directly from the dropdown; managed tunnels stay read-only because their state belongs to MDM policy.
Bandwidth peek. When at least one tunnel is active, a combined live receive (↓) and transmit (↑) rate appears between the tunnel list and the actions block. The rate samples once per second while the menu is open and goes away as soon as you close the menu — the row hides itself entirely when no tunnel is connected.
Status icon. The menu bar glyph stays dim when every tunnel is inactive and becomes fully visible while any tunnel is connecting, connected, disconnecting, or re-establishing its connection.
- Manage Tunnels brings the main window forward (or creates one if Vylos was launched as a menu-only app).
- Import Tunnel(s) from File… opens the standard macOS Open panel and routes the selected file through the same import flow used by Finder's Open With.
- Settings… opens the Settings window described above.
note
On macOS 12 the menu includes the same status header, tunnel list, and management actions. Its icon still dims when every tunnel is inactive and becomes fully visible when a tunnel is engaged, but the menu does not include the live bandwidth row.
Add Tunnel
The toolbar + button is a split menu with two focused entry points instead of the iOS-style segmented add sheet. The same items are mirrored in the File menu so keyboard shortcuts work without opening the menu.
| Menu item | Surface |
|---|---|
| Add Manually… | Focused sheet hosting the shared tunnel form with native Cancel / Add toolbar buttons. Bound to ⌘ N. |
| Import from File… | Standard macOS Open panel filtered to .conf, .vylos, and .zip — multi-pick allowed. Bound to ⌘ O. |
After a multi-file import the results sheet aggregates outcomes for every picked file so failures are easy to spot.
macOS 12 uses its legacy toolbar presentation, while later releases use the current toolbar style. Both open the same focused manual-entry sheet and multi-file picker.
Detail Pane
Selecting a tunnel from the sidebar opens a two-tab detail pane. macOS keeps status and configuration together for a quick review of a tunnel, with bandwidth on its own tab.
| Tab | Contents | Shortcut |
|---|---|---|
| Overview | Summary header, connect / disconnect toggle, per-peer runtime metrics, Interface and peer configuration, Split DNS, and On-Demand Activation rules. | ⌘ 1 |
| Bandwidth | Mac-sized chart with 24-hour and 30-day ranges and cumulative received and sent totals on macOS 13 or later. macOS 12 shows the totals and a chart availability message. | ⌘ 2 |
Overview shows the toggle, Interface, and Peer sections only for tunnels you created. Managed tunnels stay read-only because their state belongs to MDM policy.
Bandwidth recording continues whether the detail pane is open or not, so switching tabs never clears the chart history. On macOS 12, live handshake and Rx/Tx counters remain available in Overview even though the historical chart requires macOS 13.
App and WireGuard logs are available in Settings → Logs.
Editing a Tunnel
Press ⌘ E (or choose Tunnel → Edit Tunnel…) to edit the selected user-created tunnel. On macOS 14 and later, the form opens in a separate editor window; on macOS 12 and 13, it opens in a modal sheet.
The form has Cancel and Save actions so changes are explicit. Editing is unavailable for managed tunnels.
Locking Vylos dismisses an open editor window or sheet to protect the form contents.
Multi-Window Edit (macOS 14+)
Right-click a tunnel in the My Tunnels sidebar section and choose Open in New Window to spawn a standalone editor window for that tunnel. Each editor lives in its own scene, so you can open two tunnels side by side and edit them independently without losing form state when you switch between windows.
The new windows participate in standard macOS window management — close them with ⌘ W or cycle them from the Window menu. Locking the app dismisses open editor windows.
note
Multi-window editing requires macOS 14. The Open in New Window menu item is unavailable on macOS 12 and hidden on macOS 13.
Window State Restoration
On macOS, Vylos remembers the main window's selected tunnel and active detail tab (Overview or Bandwidth) when you quit and restores them the next time you launch. Separate editor windows keep their own form state while open.
The edit sheets on macOS 12 and 13 are one-shot dialogs and do not reopen on launch.
info
For general feature information, see What Vylos Can Do and Feature Compatibility.